- Home
- Oil paintings
- Prints
- Commissions
- Art for offices
- Drawings
-
BUY APPAREL
- Dungeness FONT
- Open studios
- About us
- Selected exhibitions
- Contact us
- Art techniques
- Purchased paintings
- Customer reviews
- Site map
- Press release
- Open Studios Blog
- Crookid Stiks Blog
- dungenessopenstudios
- * on Instagram *
As with all artists techniques that feature in our How to guide - Our guide to making a wooden stretcher shows how we prefer to make the stretcher that serves to stretch a canvas - We prefer our canvasses not to have corner wedges - as we have never found it necessary to use them.
We like the look of a deep pan canvas so that you have a good shadow cast by the finished painting.
A deep and solid stretcher gives the finished painting a sense of monument and presence.
The Tools that we use are also just for guidance you can use more basic tools - making everything by hand if you wish rather than using power tools
Make a Wooden Stretcher
 |
 |
 |
| 1. A choice of tools | 2. Building the Jig | 3. The Jig |
 |
 |
 |
| 4. Cutting timber 30 degrees | 5. Tools for mitre cuts (a) | 6. A mitre cut |
 |
 |
 |
| 7. Tools for mitre cuts (b) | 8. Using the Jig to fix mitres | 9. The sturdy stretcher! |
How to Make and Do
This stretcher is 14 inches by 20 inches. All work should be carried out on a level and stable surface. All health & safety measures must be observed. See Government Health and Safety Site http://www.hse.gov.uk/
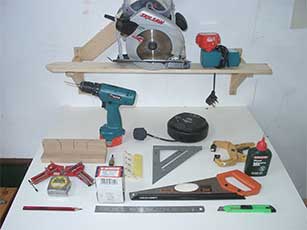
Image 1 - Tool list
- Circular Saw, Cordless drill & charger, extension lead, mitre block, 45 degree square, clamp, sandpaper (rough) 2 corner clamps, drill bit, countersinker, 1 & 1/4 inch posi-drive/Phillips screws and bit, wood glue, metal ruler, tape measure, pencil, fine toothed saw and craft knife.
- You will need at least 2 metres/5ft of 2 x 1 inch timber lengths, a ply-board base 18 x 14 inches, screws. A jig will hold the other side of the stretcher in place while you work. Making a jig saves you time... Build one! Ensure that the bed of your jig allows your hands enough room to work freely - See Image 8 (Using the Jig).
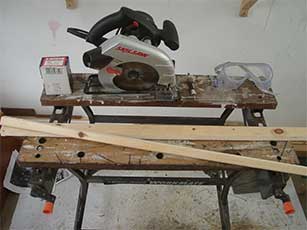
- We use a circular saw to rip down the timber for a stretcher. Set the blade angle to produce a 30 degree cut, set blade to be just proud of the depth of the timber. Set guide to the desired timber width ( 2 - 3 inches). Screw lengths to be cut to your stable wooden surface. Make sure that these screws Will Not interfere with the cutting line.
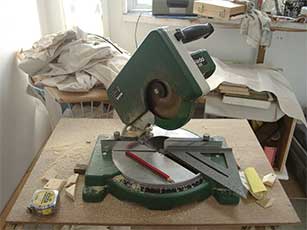
- Use a chop saw for opposing mitres - or a pre-cut mitre block is just as accurate. Use the off cuts to make corner braces or cut 4 identical opposing mitres, no longer than 5 inches x 1 inch - see image 9.
- The jig will hold you painting stretcher accurately while you work on each corner. Try to work on two opposing corners at the same time. Tighten both pre-glued mitres together - using corner clamps. When tight, drill through the join and screw together. Set both corner braces in place, drill a guide hole, remove then glue and screw. Repeat for the other two corners (always using the jig).
- If you do not have, or if you lack the confidence to use a circular saw - ignore instruction 4 and attach rebated beading to precut timber lengths.... Always be safe.


